Notification Channel
Categories:
This section describes operations to manage notification channels, including viewing, adding, updating, and deleting notification channels.
View Channels
To access the notification channel management page, navigate to Settings –> Notification Channels, as shown below.
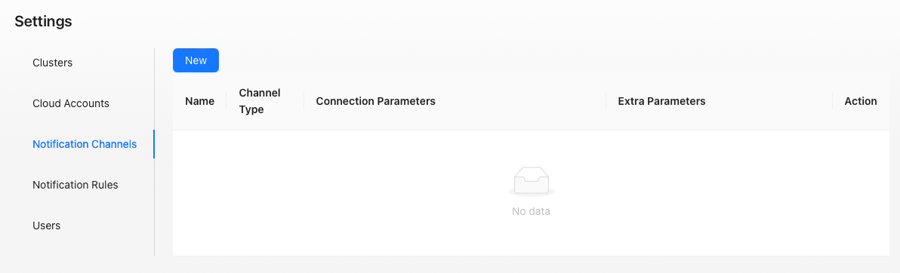
Notification channel management page
Wiseinf Inc.
The notification channel management page displays channels in a list format with the following columns:
- Name: The name of the notification channel.
- Channel Type: The type of notification channel.
- Connection Parameters: Displays the connection parameters for the channel type.
- Other Parameters: Displays additional parameters.
- Action: Provides actions such as editing and deletion.
Adding a Channel
To add a new notification channel, click the Add button at the top of the notification channel management page, select the channel type, and fill in the necessary information, as shown below.
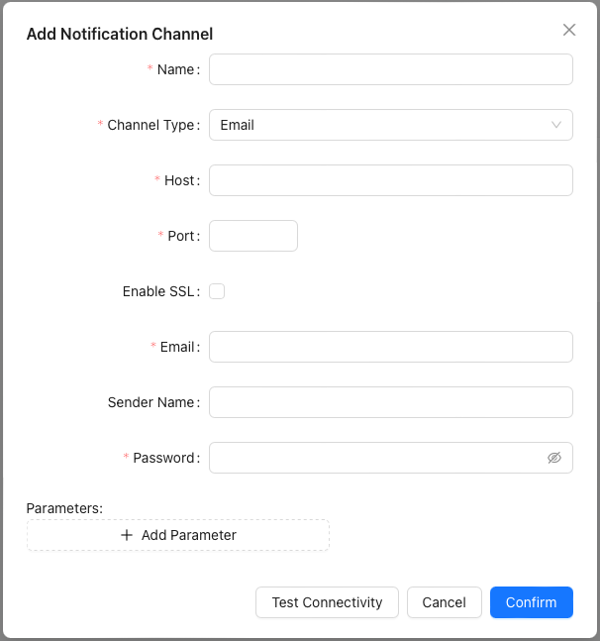
Add Notification Channel Dialog
Wiseinf Inc.
Refer to the table below for field names and descriptions:
| Field name | Description |
|---|---|
| Name | Name of the notification channel. |
| Channel Type | Type of the notification channel. Currently, only Email is supported. |
| Host | Email SMTP hostname, e.g., smtp.wiseinf.com |
| Port | Email SMTP port, e.g., 25, 465 |
| Enable SSL | Whether to enable SSL (default is disabled). |
Email address, such as [email protected] |
|
| Sender name | Name of the sender, e.g., Wiseinf |
| Password | Email SMTP password. |
| Parameter list | User-defined parameter list in key-value pair format. This list can be referenced in the notification channel template using {{.param.parameter_name}}. |
After entering the required information, click Confirm button to add the notification channel.
Note: Consult your email service provider or email system administrator for specific values of the above fields.
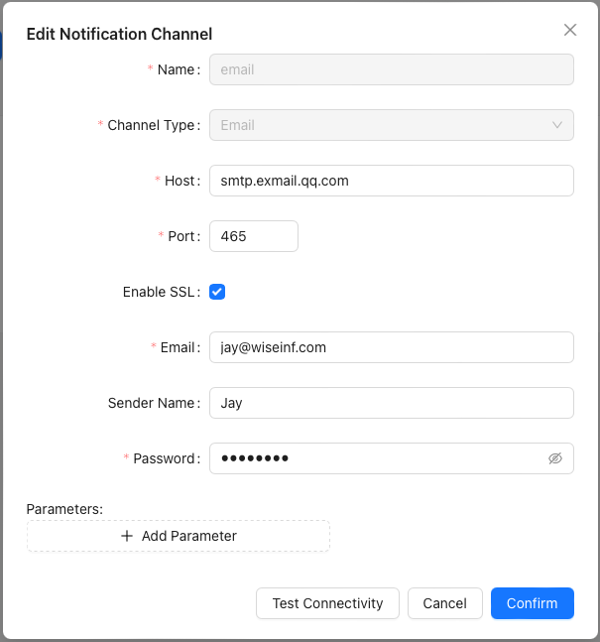
Updating a Channel
To update a notification channel, click the Edit button in the notification channel management list to modify the channel information, as shown below.
Edit Notification Channel Dialog
Wiseinf Inc.
The field names and descriptions are identical to those in the Adding a Channel section.
After entering the required information, click Confirm button to update the notification channel.
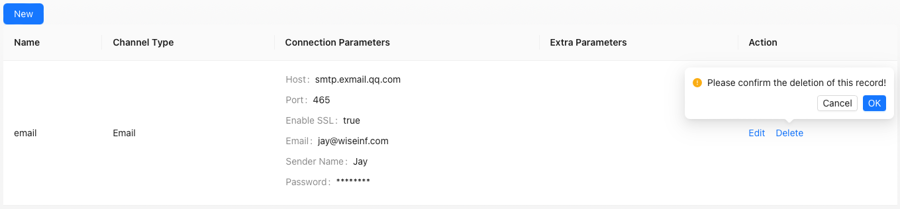
Deleting a Channel
Click the Delete button in the list of notification channel management pages to delete the notification channel, as shown below.
Edit notification channel dialog box
Wiseinf Inc.
Before deleting the notification channel, a deletion confirmation dialog box will pop up, and the deletion operation will be performed after the user confirms.
Note: When the notification channel is used by notification rules, it will prompt that the deletion was unsuccessful. You should first delete the notification rules that use the notification channel, and then delete the notification channel.
To delete a notification channel, click the Delete button in the notification channel management list, as shown below.
Delete Notification Channel Dialog
Wiseinf Inc.
A confirmation dialog box will appear before the deletion is finalized. After confirmation, the channel will be deleted.
Note: If the notification channel is being used by notification rules, the deletion will fail. You must first delete the notification rules associated with the channel before deleting the channel itself.