Notification Rules
Categories:
This section describes the details of managing notification rules.
View Notification Rules
To access the notification rule management page, navigate to Settings –> Notification Rules, as shown below.
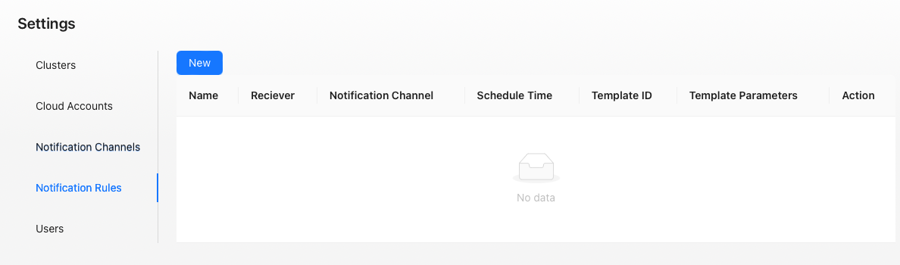
Notification rule management page
Wiseinf Inc.
The notification rule management page displays rules in a list format with the following columns:
- Name: The name of the notification rule.
- Channel Type: The type of notification channel associated with the rule.
- Connection Parameters: Displays the connection parameters of the associated channel.
- Other Parameters: Displays additional parameters.
- Action: Provides actions such as editing and deletion.
Adding a Notification Rule
To add a new notification rule, click the Add button at the top of the notification rule management page. This will open the Add Notification Rule dialog box, as shown below.
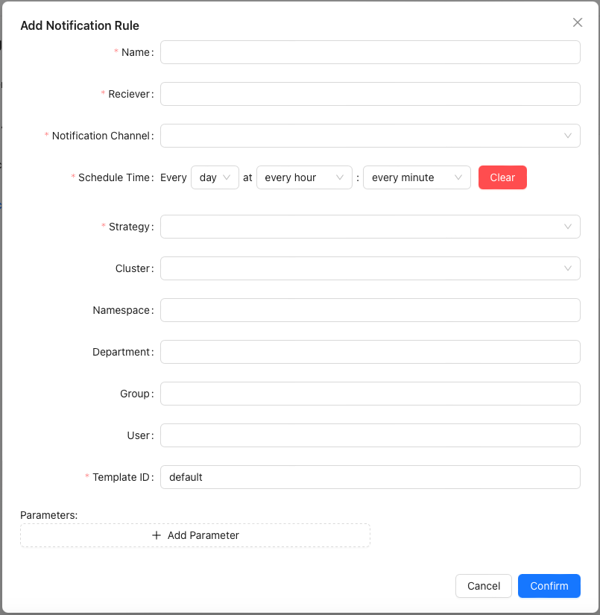
Add Notification Rule Dialog
Wiseinf Inc.
Refer to the table below for field names and descriptions:
| Field name | Description |
|---|---|
| Name | The name of the notification rule. |
| Receiver | The notification recipient’s address, such as [email protected] |
| Notification channel | Select the specific notification channel name from the drop-down box. |
| Scheduling time | Set the specific scheduling time for this rule. |
| Optimization strategy | Select a specific optimization strategy. |
| Cluster | Select the cluster to focus on. |
| Namespace | Enter a namespace name; leaving it empty will match all namespaces. |
| Department | Enter a department name; leaving it empty will match all departments. |
| Group | Enter a group name; leaving it empty will match all groups. |
| User | Enter a username; leaving it empty will match all users. |
| Template ID | The Template ID name, with default as the default value. |
| Parameter list | A user-defined parameter list in key-value pair format. This list will be passed to the notification channel template and can be referenced using {{.param.parameter_name}}. Parameters with the same name in the notification channel parameter list will be overridden. |
After entering the required information, click Confirm button to add the notification rule.
Updating a Notification Rule
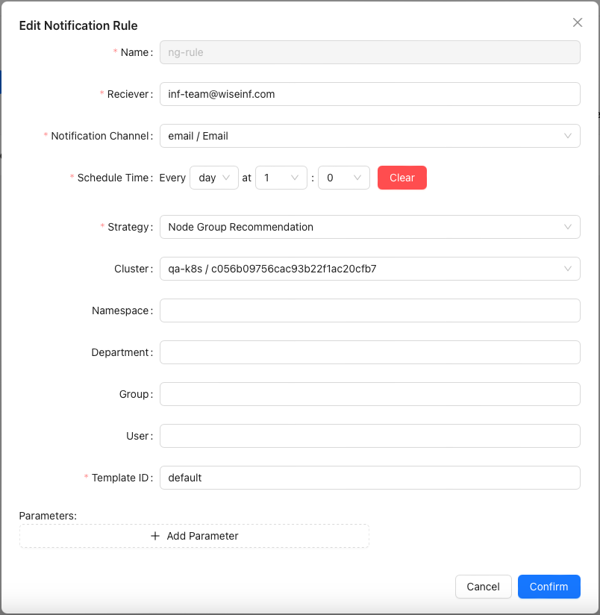
To update a notification rule, click the Edit button in the notification rule management list. This will open the Edit Notification Rule dialog box, as shown below.
Edit Notification Rule Dialog
Wiseinf Inc.
The field names and descriptions are the same as those in the Adding a Notification Rule section.
After entering the required information, click Confirm button to update the notification rule.
Deleting a Notification Rule
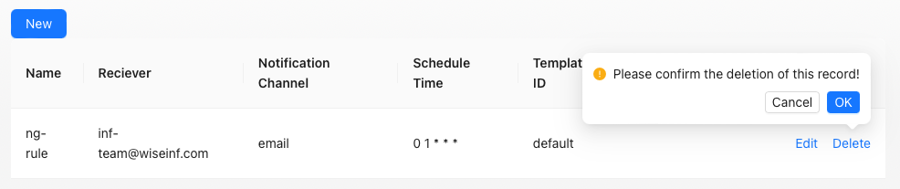
To delete a notification rule, click the Delete button in the notification rule management list, as shown below.
Delete Notification Rule
Wiseinf Inc.
A confirmation dialog box will appear before the deletion is finalized. After confirmation, the rule will be deleted.